Mr. Random Number Generator chose number 5. Congratulations to Maria! She won my quilted notecard giveaway! Please let me know what colors you would like me to include on your cards, Maria! I can't wait to make them for you!!
Sunday, March 20, 2011
Monday, March 14, 2011
More potholders and a mugrug!
A few posts back I showed my friend Bobbi a sneak peek of these babies. She received them on Friday, so now I can post their entire picture.

These spawned out of PP6 since Bobbi didn't quite make it into the swap, we decided to do our own swap. I chose to do pinwheels since I remembered her saying that she liked them in a post way back. I like to make pinwheels, too. They are really fun!


We also decided to exchange a mugrug. This is my very first mugrug as well as my very first attempt at free motion quilting. Bobbi likes owls, so I chose some Hooty Hoot and put it with some scraps from a 12 Days of Christmas charm pack that Bobbi gave me last year. In the center of the mugrug, I tried to write her name with the quilting. It didn't turn out so great, but I've heard that famous saying, "Practice makes perfect!". Let's hope so!


Saturday, March 12, 2011
Wow! Excitement!
Click here to go to my 100th post giveaway!
Wow! I was so excited when I checked one of my favorite blogs today! Made by Rae had a picture of my dear, sweet J in her knit and crochet for boys picture pool!

His hat is definitely not the coolest one in the pool. Go over and check out the headphone hat!
I love it!
Friday, March 11, 2011
100th Post Giveaway!!
It took me quite awhile, but I finally made it to my 100th post! Go me! It will probably take me an hour to write it in between comforting a crying baby, getting water for two boys who are capable of getting it for themselves, breaking up a fight about who gets the green cup, answering the ringing phone and the beeping dryer, and numerous other things. (The crying baby thing happened already as I was typing the sentence!!)

Anyway, I would like to have a giveaway for YOU!
I started making quilted notecards, which you already know if you read this post, and now I can't stop. So the winner of this giveaway will get a set of three notecards packaged up all pretty, and the best part is that the winner will choose the color! I will custom make them to your liking! The cards in this post are listed in my little Etsy shop. Aren't those owls adorable?

You have two chances to win.
1. Leave a comment- anything you wish! If you have any Etsy shop tips for a new Etsy shop, that'd be great.
2. If you are a follower, let me know in a separate comment. New followers are welcome, but please follow only if you like what you see.
The giveaway will run through Sunday, March 20 at 6PM EST. Be sure to leave an email address. Mr. Random Generator will pick my winner. Good luck!
Wednesday, March 9, 2011
notecards
Well, tomorrow is the day...back to school for me after my fantastic maternity leave. I sure will miss being home with Baby M, but rumor has it that my students are excited that I am returning. So, I am hoping to get in some good cuddling and a bit of sewing today.
So far I made a set of notecards. I put them in my Etsy shop. There isn't much in there, but I am working to build up the inventory. Hopefully when school is out for summer I will be able to do more.


Sneak peek for a friend
These are supposed to arrive on Friday. I thought that you might like a little preview.


Monday, March 7, 2011
Off the needles and onto the noggin...
Finally, a finished roll brimmed hat for my dear, sweet J. Aren't those big brown eyes adorable?


Off to school he goes.
And just for fun, here's baby M.

Saturday, March 5, 2011
Scratch Mitt Tutorial

Have you ever not been in the mood to do the laundry or run to Walmart? Me, too! Baby M is constantly scratching his face and his mom if I don't have mitts on him,and needless to say, they get dirty fast with a wanna-be thumb sucker wearing them.
Now any normal mom would know that the five minute trip to Walmart would have been a heck of a lot faster than sewing scratch mitts, but being off on maternity leave has left me with some bad habits; not getting up and showering right away is probably the worst one, so Walmart was out of the question. I certainly would not want to end up on the People of Walmart website!
I don't have a serger, which would be wonderful for this little project I can only imagine, so if you do have one you probably wouldn't follow all of my tedious steps. Lucky you!
I thought, how hard can this little project really be. Technically I wouldn't even have to hem the top (wish I had a serger!) because knits don't fray. I had great intentions of simply using elastic thread and some knit fabric and it would be o' so easy, right? Not so fast...my new machine refused my elastic thread no matter what I did. Any tips are welcome! My old machine, which I gave to my Grandma was super with elastic thread. I miss my old guy.
Oh well, enough chit chat, let's sew scratch mitts!
Here are some things that you will need:
~knit fabric cut into 4"x4.5" rectangles- I used an old T-shirt
~ballpoint needle
~rotary cutter and ruler or scissors to cut your rectangles
~apprx. 2- 5" pieces of 1/2 inch elastic
~matching thread
~fabric marking pen, although any pen will do
~sewing machine (duh!) a serger would be even better!

First, cut out your rectangles.

Sandwhich two rectangles together. You will now have two rectangle sandwhiches. Find a green Gerber bowl or jar or anything round and trace curved lines on the bottom of both stacks.


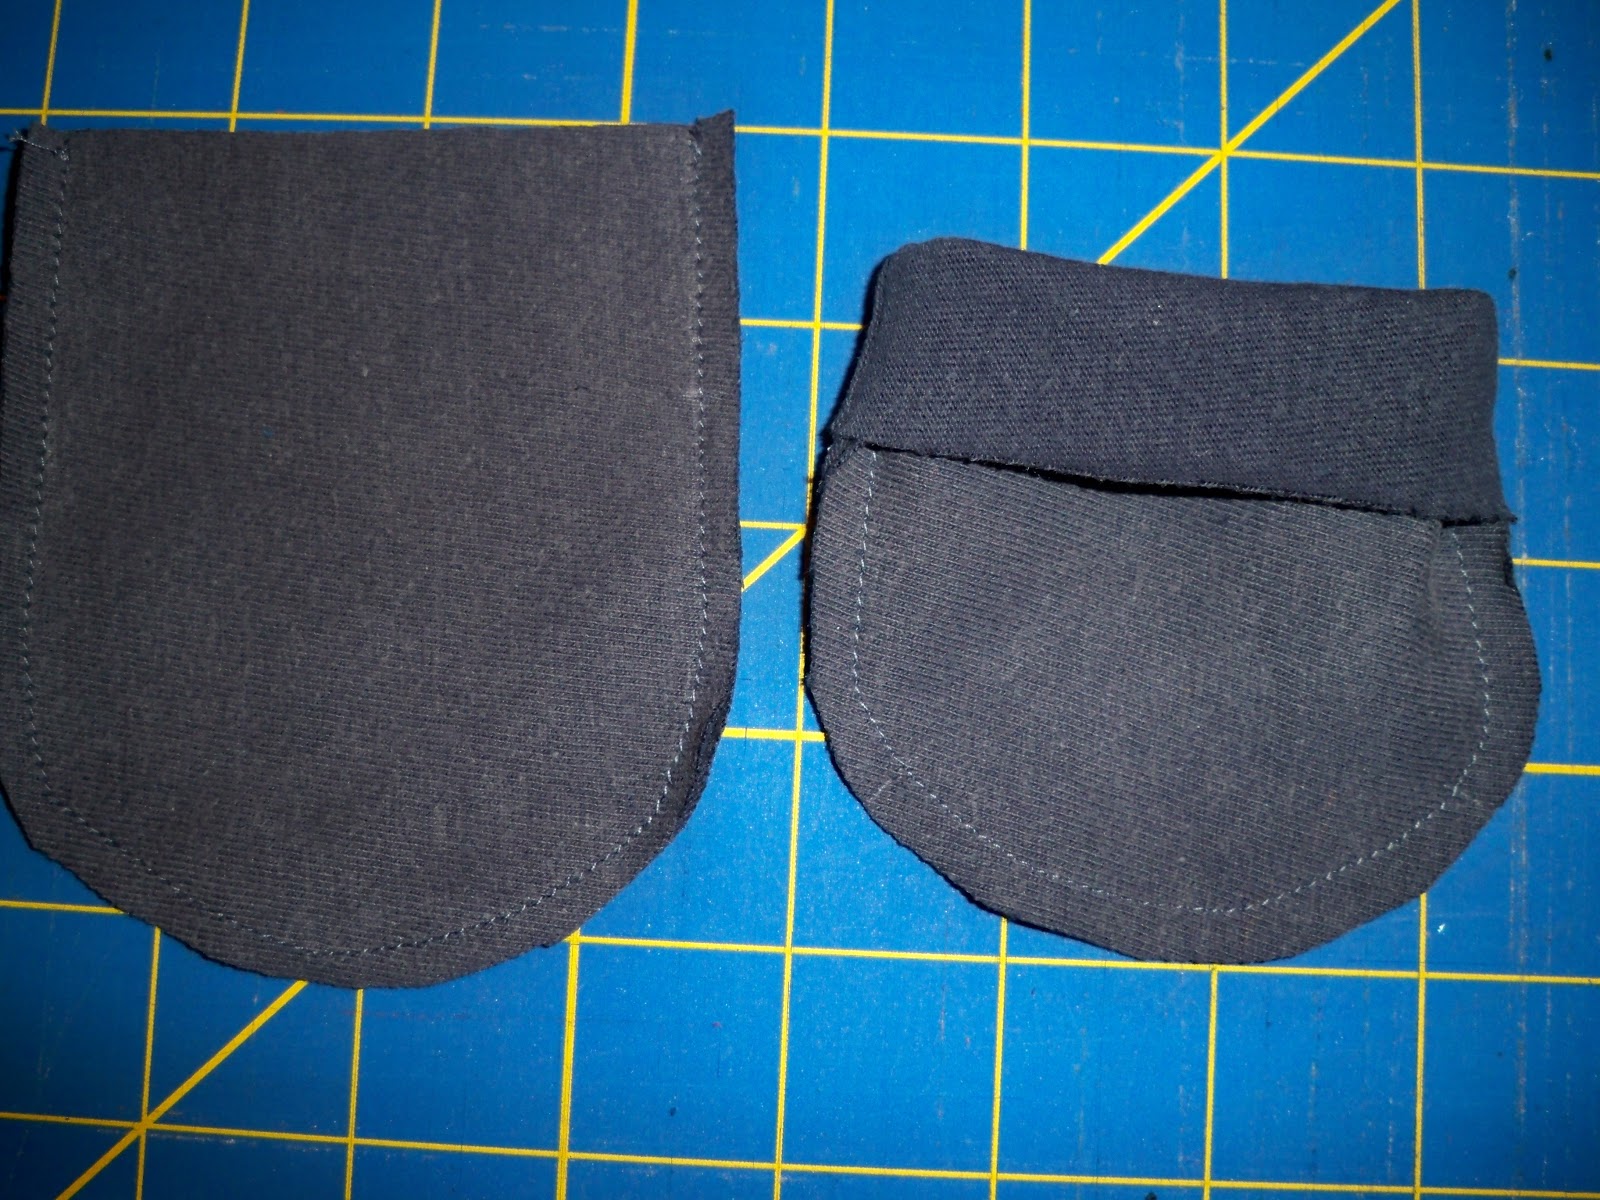
Sew around the bottom to create a casing. I used a 1/4 inch seam. Be sure to LEAVE AN OPENING to insert the elastic.

As with anything small, do not do this:

Be sure that the other side is not under the side that you are sewing.
Place a safety pin in one end of your elastic.

Thread the elastic through the casing. Remove the safety pin.

Sew the ends of your elastic together. You may choose to overlap the ends to make a more flat seam, but I found that the way I show you in the picture worked just great for this small project.

Finish by sewing the gap in the casing closed.


"Thanks Mommy! These are the bomb!"

Tuesday, March 1, 2011
Baby Pants
Here is the first pair of pants for Baby M created by me! I'm sure there will be many pairs to follow. I used the Newborn Baby Pant pattern from Made by Rae. I did buy her BBB Pant pattern, but he's not quite ready for those just yet.

This pattern is so easy to follow and can be made with or without the pockets and cuffs.

See how happy these pants make Baby M? There's nothing better than a laughing baby!

The fabric is from Debbie Mumm, the same line that I used for these potholders and this bag and this pillow and this apron. I seem to have quite a bit of this fabric left. Frankly, I'm quite sick of it. Maybe I'll be able to swap some of it in the Sew Sara Scrap Swap. It did make some cute pants though.


Subscribe to:
Posts (Atom)